Showing posts with label sewing. Show all posts

Wednesday, October 6, 2010

It's alive!!!

Very well, as I said before, I haven't been writing a lot, but the works are in progress - slow and steady, right?

In the last couple of weeks I've been developing a website as a freelancer - oh, I just love building websites, especially working from home! And just like it happens every time something changes in my routine, it's difficult to put the end-of-day-fun in its own place. But I'll get organized some time.

Meanwhile, look what I made while I wasn't writing in the blog!


Remember the Drift Scarf? Well, it's kinda big now... sort of. Around 40 cm, right? (~25 inches) The thing is, every time I make the point that makes the knitting look so nice, the scarf shortens. So it doesn't grow very fast... but I think it's coming along pretty nicely and, hey, if you can't wear it this winter, there's always next year's!

And speaking of next year, we're really close to Christmas again and my nativity scene is practically at the same point. I'm not even commenting this, it's a work worth of Greek mythology, and I don't care when it's going to be finished. It will someday.

It's even further than in this pictures, because it's been days since I started writing this post. The word is: organization. It seems like I can never get organized!


I think I commented in the previous post that during this absence time I made a case for the new laptop at home (here in Brazil we say "notebook" much more frequently - the americans I've worked with always found this very odd). Look how it looks closed:

It looks like floating in a white background because the picture got too much light in it... it looked gray, and in fact it's black! Now look how it is open:


Ah, isn't it cute? I closed it with velcro, and I was careful to leave the softer side on the lap, so it won't scratch the little thing. Because after all, Apple makes gorgeous stuff, mas they get spoiled so easily...


My husband wants me to embroider the case. He's even chosen a motif: a pineapple. Because there's an Apple inside, you see? (eyes rolling...) I still haven't felt like doing it, especially because it's not going to be easy to embroider right on the case, now it's done. There's a layer of stuffing, and where would the laptop be while the embroidery was in progress? Maybe I'll embroider some other fabric and then do some applique. Or maybe I won't do anything. Personally, I'd rather do this case in soft pink, with beautiful patchwork fabric... but I don't think my husband would have liked it so much.

To wrap up, when I decided to take these pictures the day was sunny (it is again today, after days-and-days-and-days of gray sky), so now you'll meet some of my little plants:


Estas são minhas mini-Kalanchoe (I don't know if that's how it's written... and I'm too lazy to ask Google) (I couldn't hold myself, and asked - and I got it right!). They came with red flowers, which looked adorable in the white vase - but they've never shows again! :( I'm still hoping they'll come back some day.


And here's my vase of african violets! After the first bloom, it took a long, really long time, for flowers to show up again. It was worth it, wasn't it?

Did you notice the dishcloth under the vase? I did that too! I'll tell you the story in some other post, ok? ;-)

Wednesday, April 28, 2010

Finishing this stuff is the real challenge...

Remember the sewing circle? It was a lot of fun, but so far the project stuck at this point:


Like I said, I wanted to applique the tower on a purse. I thought about doing it in a fabric striped in grey and white, which would ihghlight the foundation a lot. I also wanted to embroider "Paris" above it, since I already have tome beads around here...

What's left to finish: make the said purse!

Why I can't finish it: there is no fabric striped in grey and white around here. This can only mean one thing: shopping! Oh, hobbies really cost money...

What I can do to finish it: Try another fabric for the purse. I have enough black fabric, if I make a frame in another color, maybe using the scraps of the grey fabrics I used for the tower... I need to think more about this. Or simply buy the said fabric. We'll see.

Sunday, April 25, 2010

Pause the WIPs

Calm down, calm down! I am not postponing my endless WIPs!

I just wanted to share a tour I took recently: I've visited the Patchwork Fair! I went on the end of the last day, and I must say it was a great idea. Some boothes had sales for the end of the event, it was not crowded, and I could see everything in peace.


What I like most in these fairs, I admit, is to be able to shop for fabric kits, which makes things easier for me. I keep looking at the kits and thinking that "this one would make a great bag", "this would look good in a foundation", "this would be a nice crazy". But it is also really cool to see what the professionals come up with, there are always new ideas to inspire.


That said, I give you my new acquisition:


Isn't it cute? I've seen this little sheep at the Semeart store booth and imediately fell in love with it. Unfortunately the store didn't have the project to sell - for what I've heard from the shop owner, it's hard trying to keep up with the orders! I think I wasn't the only one who asked about the sheep, because of the sellers reaction, but I couldn't let the opportunity pass. So, after visiting the rest of the fair, I went back there and bought the last little sheep. Twenty minutes before there were at least half a dozen, so I guess it may be considered a success.


I hope the shop doesn't mind, but I also ended up buying fabric to reproduce the little sheep - who wouldn't like to get one for a gift? I simply have to make sheep like that!


I'll be able to make a whole flock with that!


The rest of my shopping is here:


A Clover flower yo-yo maker, a project by Amy Butler for the Sophia bag (which I've been looking for for over a year!), three kits from Lee Albrecht School of Embroidery (a cross stitch, an hardanger and a blackwork), a fabric with christmas-y bears to use for Christmas, a fabric with birds pictures (beautiful!), a fabric with big flowers and a fabric kit in earthy tones (anyone see the bag they're going to turn into?).

Phew.


Yes, that will soon take part in the WIPs list. But I can't miss opportunities like that, imagine how much I saved in delivering fees buying all that at the fair? And the best part: next month there's another one! :-)

Until then, keep on with the WIPs and more images of my new mascot:


Sunday, March 14, 2010

Crazy about knitting

In the last weeks, I've been crazy about knitting. That is partially my friend L.'s fault, she introduced me to the group Crazy Knitting Ladies - which, despite the name in English, is mainly formed by brazilians. (there are some people from other countries, if I'm not wrong, and also a few boys, something rare in the world of knitting)

The amount of messages per day is immense - sometimes just people congratulating others for the works they've completed. Other times there are links for patterns, questions, and stuff like that.

I'm still working on my first knitting project, the brown bag I've already shown here. But since it's kinda big, it takes a while to finish. Actually, I was a little tired of working only on my WIPs, they're taking too long to be completed. So I decided to do something small and quick for A Make a Month. I was going to make a new sewing project, I have even drawn it - but the needles called me up! So there I went to look for a small pattern in Ravelry.

For those of you who don't know it, Ravelry is a community of people who knit (and crochet). It's a big hit, by the way. There you can find free and paid patterns, and I needed something free, easy and quick. I found lots of cool stuff, which I've added to the list of projects I want to make from Ravelry itself. This one looked like exactly what I wanted:


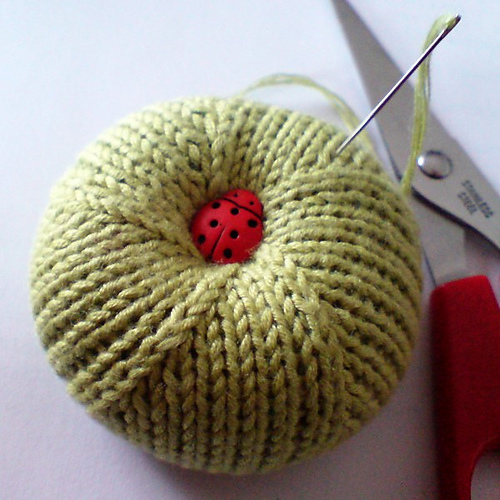
A pincushion! Isn't it cute?

The problem with this pattern (Peyote Pincushion, by Iryna Klionava) is that it needs a set of four double-pointed needles, which I didn't have (note the past tense - I've just received a package on the mail...). So I thought: the most important now is to a) make a project that finishes fast and b) uses something I already have, according to the rules for A Make a Month.

Which made me decide to make a simple little square, with a crochet yarn. That's right, I haven't even used wool. That yarn is so pretty, I wanted to use it no matter what. It's been here for ages! I thought it would be nice if I used it with the knitting board, but it really is too thin. For the pincushion, that was no problem!

I've used the needles my mom lent me and the Monalisa yarn. Look what it turned into:


I also had the filling (I have a big bag of that!), so I was only lacking fabric to make the internal part. If I had only put the filling in, it would keep coming out of the knitting holes.

It was then that I found out that I don't have plain fabric! I've started buying pieces of fabric for patchwork after I've had a few classes, and usually the stores make up kits of printed fabrics. I think they even make up kits with plain fabrics, maybe they just haven't caught my eyes... but the fact is that I wanted a plain white fabric, so the colors in the knitting showed up more.

Then I remembered: last year, when I visited a patchwork event, I've bought a fabric in stripes - those that come with large stripes of matching prints. When I got home and started looking more carefully the things I had bought, I've noticed that one of the stripes had a flaw in the print, and a dirty mark that wouldn't leave even after I washed it. At the time, I've called the store many times, but they said the fabric was sold out in the supplier's, and that I could go there and pick something else in exchange. The problem is that the store is across town, and for São Paulo that's a big deal! So that I gave up exchanging anything, I had already paid for the fabric, would I have to pay to exchange it?

Now guess the fabric color... that's right, white! So I cut exactly where the flaw was to make the internal part of my pincushion.


The fabric looks like regular cotton, also printed in white. The prints look painted over the cotton, which made the sewer pencil not to erase. Imagine if I had made this mistake on another project... I would not be happy with that yellow mark showing on my patchwork! Lesson learned, always mark the fabric on the wrong side (I should've known better...).

I've cut a rectangle, sewed by machine (YES! I've used my dear machine!) and left an opening. Turned it right side out, put the filling and closed the opening by hand.


I've also hand-sewn the knitting. Simple, fast and I've used lots of things that were stuck around here.

Does it get any better than that?

Saturday, January 30, 2010

Mystery revealed

Finally! After a long week, I give you the answers for your question: "what the heck did she do for the sewing circle anyway?"

Here it is:


A paper piecing of the Eiffel Tower!

I was going to choose completely different fabrics for that, but my dear teacher gave me those - isn't she adorable? It's basically the same color choice the book I used suggests, and I thought of changing them. But I guess it turned out really good using plain colors for the tower.

So, following the sewing circle ideas, it started somewhat like this: I tried to gather a group of girls at work to join the circle. Yes, I do everything to bring more people to our crafty world. None of them seemed to be very interested, and when the date arrived, I was swamped in things to do for work, and evil people were all around - so I thought I wouldn't bring doom to myself SEWING DURING LUNCH. Imagine the nerve of being happy at the office. Nonsense.


Which made me work till late then going to my sewing supplies around 10 pm on January 13th. And the idea was to use the blog name as an inspiration - "I've been thinking of you". And then it hit me: the Eiffel Tower paper piecing! I've been to Paris last year, and I've always loved that city, don't know why. After my trip I certainly know why - it's gorgeous, to say the least. And since then I have images of the city popping in my head out of nowhere. It always makes me smile. I bought the book "365 Foundation Quilt Blocks" by Linda Causee a little while before visiting Paris, and when I saw that block I decided it would make a beautiful bag. So there I went to start my sewing circle project!


It was late and I was tired, but it felt so good to take that moment and be part of something like this. I knew that someone might be sewing a project at the same time, and it's good to feel connected through something we love, isn't it?


It was a LOT of work, I assure you.

Katherine asked us to fill some info about the project, here it is:
Wait, there's more:


Feel your surroundings: I was home, in my living/dining room. The house was quiet, the husband was in the computer, on the back of the apartment, it was late at night, so the noises were diminished. Just me and the aquarium close by, with a soothing sound of water running.
LOOK
left: the wall with a pretty painting of white flowers in a window
right: the corridor, with light coming from the room where my husband was using the computer (that darn Facebook Farm Ville...)
in front: my dining room table - and actually the whole living room (not very big apartment)
behind: my kitchen, lights off.
at your feet: my nice and light wooden floor.
above your head: just my ceiling, with bright lights.
Close your eyes what do you SMELL? - Home. And fabric. Bliss.
What can you TASTE? - Nothing, I guess.
Shut your eyes, breathe deeply and LISTEN carefully. - I have to admit it, I actually did what the sentence says. I could listen the aquarium water running, cars on the street, computer keys and mouse buttons, the pencil marking the design and then my scissors cutting the foundation fabric.

Although I have the bad habit of trying things beyond my current skills with a DUE DATE - don't do that to yourself! - I have to say: no matter how hard it was this foundation, I am so happy with the result. Now I have to pick a fabric to make the bag and find some nice text font to embroider "Paris" above the foundation. And of course, I'll try to make the embroidery in some kind of technique that I don't know yet. But I won't have a due date this time!

Thank you, Katherine, for the incentive!

P.S.: Did you like the project I chose? Sorry for turning it into a mystery... after all, the last post was full of hints, wasn't it?

Saturday, January 23, 2010

Slow and constant movement

This week was another one with strong external elements negatively influencing my craft activities. Translating: working too much for others, and almost no fun. The first part I unfortunately can only comment in the presence of my lawyer, but the second one I can talk about at will.

Please note, it wouldn't be possible for me to be here writing this post if I haven't done absolutely no craft this week. Simply because I would be so weak that I wouldn't be able to use the computer! (believe me, that already happened!) Lack of craft is my kryptonite.

Which means that - oh joy! - we have pretty things to show! BUT... sorry about that, I won't. Simply because I've been working every night in the sewing circle project and I'll only show it when it's done!! Please, don't panic. I can only say two things:

1. I have the bad habit of picking things far beyond my current skills;
2. despite the (many) difficulties, it's turning out beautiful! (putting modesty aside)

(I'm using a lot of exclamation marks today!!!)

To compensate the mystery, I'll show other things - hold on to your chair! (another exclamation mark?? what's happening??)


Thanks to Crafty Frugals, I remembered that cooking is a craft that I try very little - much less that I'd like to. My mom is wonderful in the kitchen (and, thinking about it, in crafts in general - think about unattainable goals). I, on the other hand, don't have much talent - maybe if some day I have time to invest in this art I end up awakening some chef gene and turn myself into the next Jamie Oliver (I would never be like Nigella, licking my fingers and putting them back into the pan. Imagine that.). This picture was taken out of pure pride: I've cooked tomatoes stuffed with ricotta, corn and some other little things. I thought it was great. Being the only one to taste it doesn't influence the results.


The picture didn't turn out good, but look at my little one! It took me a long time to pick my first sewing machine, months of research and budget adjustments - and then a long season of husband persuasion (you don't want to know what he said about my machine). This story's worth another post, but it's been such a long time since I got to play with it that I thought she deserved to show up in the Garden.

Yes, the secret-project is being sewn by hand. Stop asking, I'm not telling what it is.


Do you know what they are? No, no potholder. I'll decorate the kitchen with them - actually, one at a time. The tulip was my first work in Foundation (or Paper piecing). It's a patchwork technique, but it uses a base - the pattern - where you sew tiny scraps following a pre-determined sequence. Following the sequence warrants a virtually perfect finishing - not following is just chaos. Impossible. Disregard the possibility. You'll never see the end of it.

It seems odd, but despite the need of a good dose of concentration, Foundation is delightful to make. My dear teacher says the tulip defines right away if the person is of the Foundation kind or not - can I say there are Foundation and non-Foundation people? Hmm. Already said it. Anyway, apparently lots of people give up right in the beginning. I LOVED it. So much that I've made the little house right after that - which I said it's a bird house (because the pattern says so), and my father insists it couldn't be more wrong. Bird houses have the entrance (the red part) ON THE BOTTOM. And that from someone who couldn't see what the cross stich designs I make are (the nativity scene was the first one he could actually understand!). Go figure.

These two "screens" still need a place to be hung on. My mom gave me something that might work - but it needs a little finishing before being put to use. I.e., put it on the list: they're WIPs.

Tuesday, January 5, 2010

Small projects, satisfaction garanteed

I like small projects. Big projects, like the Nativity scene, are really nice to make, sometimes they challenge us - whether it is to learn a new technique or due to some difficulty that only after surpassing it we'll come to the desired result.

Small projects, in turn, have other very attractive characteristics: besides being quick to make, they usually don't demand very advanced skills, and they bring the satisfaction of getting something done. Soon. "I can already wear it".


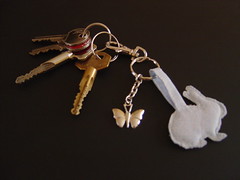
The keychain in the photo I've made last year. The project came from CraftStylish, and I took part in a draw from Superziper with it - of course, being a draw, it didn't matter the difficulty level. It was done in two hours, maximum. At the time, I still used to make my blanket stitches without going all the way to the border, but I've left this nonsense behind just a while ago, haven't I? ;-)

I always have many ongoing projects, and by the talks I have with other people that enjoy handmade and by the discussion lists, blogs and websites I follow, I know it's quite normal (for the despair of many husbands, I must say - men usually don't understand the need we have for varied materials and even different techniques for different days). Among these projects, there are no small projects - simply because they are so quick to finish that there's no time for them to get in line! They just start and finish!

When you start a more ambitious or detailed project, stop it sometimes to make a small project. The satisfaction of seeing it completed will surely give you incentive for another series of sessions with your other works in progress.

One last observation: the other keychain, that accompanied the rabbit I've made, has already broken long ago. Another proof that what's handmade is much better.

Sunday, January 3, 2010

Top 100 craft tutorials of 2009


Review what's passed is a good way to start the year, isn't it? The website The Long Thread seems to agree with this, because they've made a list of what they consider the top 100 tutorials of 2009. the links are gouped in categories, like bags, clothing and accessories, toys, home decor and a section for holidays like Christmas.

Check it out here - found Craft Daily.

This year, there are no excuses not to make pretty things.

Thursday, December 31, 2009

Sewing circle in January!

Block January 13th on your calendar. Katherine, from the blog I've been thinking of you, invites us to an event that is sure to be a lot of fun: a sewing circle!


[POSTER.jpg]

I've read about it in the Hand Embroidery Network (HEN) website. It seems simple, you just need a piece of fabric measuring 20 x 20 cm and sew it on Jan 13th between midday and midnight (I've already sent her an email asking about the time zone!). You can start it before and finish it after that time, but the fun is in forming a community during this period of time. It would also be nice to invite friends to do it together. It could even be during lunch time, at work.

It's just too easy. Let's take part of it?

Wednesday, December 23, 2009

Many things to share

Finally, after a long time, the garden blooms again!

I've got many things to share, I even thought of splitting in various posts to separate the subjects, but leaving everything together shows how much happened during my absence from here.

First of all, the nativity scene is obviously not done yet - if I couldn't find time to update the blog, imagine embroidering! Some things changed in my routine (against my will, I must say), and now there's less time for the personal stuff. Christmas is in 2 days and this is the last picture of the scene:


The young shepherd isn't done yet. And it still misses the details, the stars, the sky, the contour. It'll really be for next Christmas, but I do think it's coming out beautiful! Something that made me lose time was that "little mistake" I've made in counting stitches, remember?


Couldn't get it? Look closer:


Anyway... next year.

Another day, I believe two Sundays ago, I've had a big surprise: when I got home, I found out that there was a package waiting for me! Look what it was:


My Trish Burr books! I've waited for them for several weeks (imported books take a while to get here), but I was really glad to get them. Is there a better way to start a new week than with books that beautiful?

They all explain the basic stitches of thread painting, the same technique that Mary Corbet taught (and that I've followed for a while, before holding everything to start the nativity scene). I'll get back to her lessons, and then start a series of posts inspired by them and Trish's books. I hope I can teach the little I know, and that you get as excited with it as I did!

Something sad: I've ordered Mary Thomas's Dictionary of Embroidery Stitches book, but it's unavailable! Not even Amazon has it on stock... it's been really well recommended by Mary Corbet and also by Amazon customers, but... I don't know how to get it.

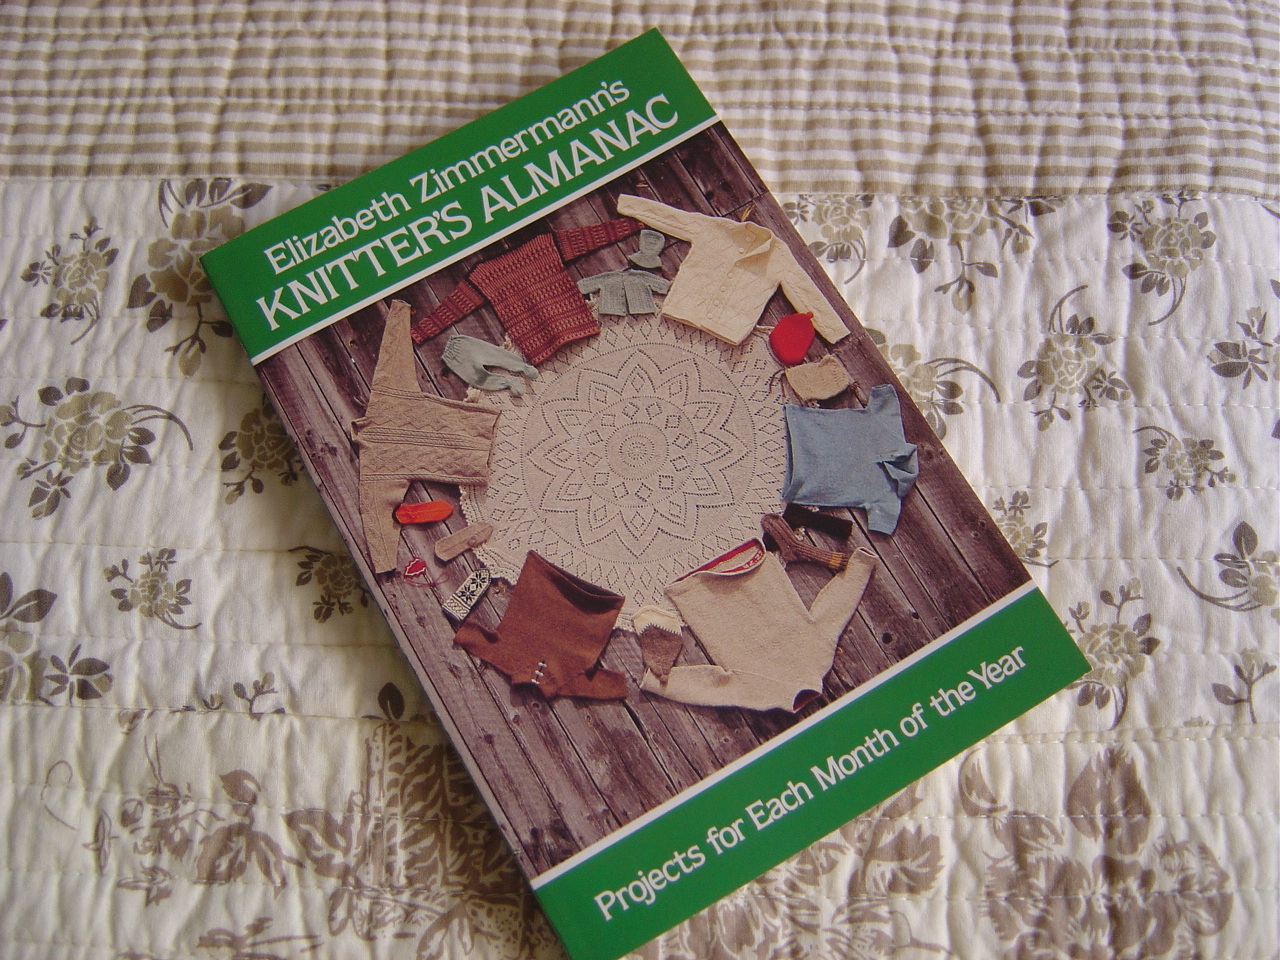
Two weeks later the last book I've ordered arrived:


My friend L. will have to wait until next year to put her hands on it! I can already tell you that I loved it, I've started reading the moment I got it out of the box. EZ, like the folks in the knitting lists use to call the author, has also written the famous Knitting Without Tears - it's on my gift list for myself, but just like the nativity scene, it'll be for next year! The Knitter's Almanac has a story+project for every month of the year - it follows the north hemisphere seasons, so maybe it would be more comfortable to follow a different order over here. If you get started in doing everything like EZ does: she urges the knitter to change all things, follow the instinct and adapt the projects at will. Sometimes it seems like she's giving a hard time on people who follows everything as is on the graphics (like me, for instance... but I've just started knitting!). I recommend it, it's really lovely to read!

What else? Oh yes, my friend S. came to visit, and I had a book to give her as a gift. But I am absolutely against paper wrap, you know? You spend money, make a nice wrap, the person opens it, and it goes to trash. Inadmissible. So that I just HAD TO MAKE a last minute gift wrap:


Isn't it cool? She can use it to take books with her to the subway, or use it to keep something at home, documents or anything. It was really simple and quick, and I think it came out nice. She loved it! I'll publish a post later with the tutorial.

Are you in a hurry this year-end too?

Sunday, November 29, 2009

Tutorial: Passport Wallet

After a long time, I'll do as I promised: behold the passport wallet tutorial!


Before anything, remember I've done it a few days before traveling, and I was DYING to do something on my sewing machine. So the fun was in making it, and not worrying if it was perfect. And having only made one purse with my machine before this project, imagine my skills with it...

The project started on paper, of course, but I added things as I went. Don't mind the crooked sewing, and go ahead!

The drawing I've made before starting cutting fabrics was sort of like this:


I've measured my passport (it's 9 x 13 cm), and then I've added a few centimeters around. I also wanted to have pockets I could use for credit cards, and I've ended up adding another pocket behind the one for the passport. Concept done, hands on!

Don't forget to add to the measures below, so you have sewing margins. 0,5 cm each side are usually enough.

Cut the plain fabric:

- one piece 10 x 11, for the passport pocket
- one piece 16 x 11, for the pocket behind the passport
- two pieces 7 x 11, for the smaller pockets
- one piece 16 x 22,5, to be behind all pockets (the back of the wallet)

On the patterned fabric:

- two pieces 5 x 11, to close the smaller pockets
- one piece 16 x 22,5, to be the exernal part of the wallet

Also cut a piece 16 x 22,5 cm of filling.


First sew the pockets: the one behind the passport on the back, and the passport pocket over it. Now sew the small pockets on the back fabric. Then sew the pocket flaps apart, and after that sew them above the pockets. Finally, make the sandwich with the internal part (with all the pockets already in place), the filling and the external part, wrong side out. Leave a space without sewing so you can turn the sandwich the right way.

Turn eveything inside out, and push the corners with a pencil or even a knitting needle. Sew the opening to close.

I've chosen to close out the wallet with buttons, but you could also make a flap with velcro - one of the buttons got ripped out in the middle of the trip, because the backpack was a mess during our long walks.


But it's cute to close it with elastic, and you can fill the wallet as much as you need and things are hold tight in there.

That's it! Very simple and made in two hours. It's very practical during travels, because you can keep everything inside it, and the size makes it easy to find inside the purse. I hope you enjoyed it, go ahead and leave a comment! If you have questions about any steps, just write me about it. Have you ever done any project like this, without much planning, from the top of your head? Let me know!

Thursday, November 19, 2009

Mini-purses

Another tip I got by e-mail from Craftzine.com: mini-purses!


Get the tutorial here. They teach how to do the simple version, flat, and the one in the picture, fluffy. I'll start following this site, it's really well-done!
I hope to post the tutorial for my passport wallet today, so... stay tuned!