Showing posts with label tutorial. Show all posts
Sunday, January 3, 2010
Top 100 craft tutorials of 2009
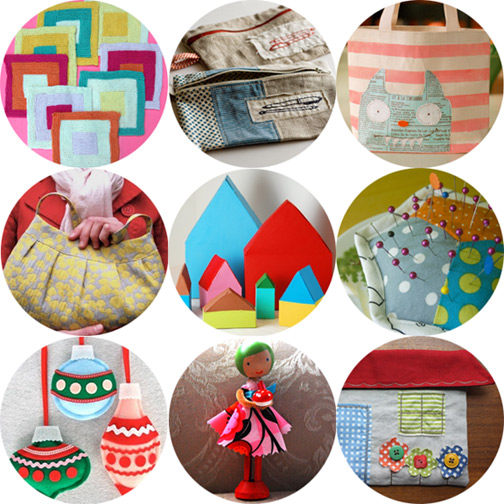
Review what's passed is a good way to start the year, isn't it? The website The Long Thread seems to agree with this, because they've made a list of what they consider the top 100 tutorials of 2009. the links are gouped in categories, like bags, clothing and accessories, toys, home decor and a section for holidays like Christmas.
Check it out here - found Craft Daily.
This year, there are no excuses not to make pretty things.
Saturday, January 2, 2010
Tutorial: book sleeve
Today I teach you how to make a book sleeve!
Between you and me, it is so easy that almost didn't deserve a tutorial. Almost. As I told you before, I've made this little project real quick, to wrap a book I was going to give as a present. Because we don't like disposable things, do we? Not at all! So let's make the wrap:
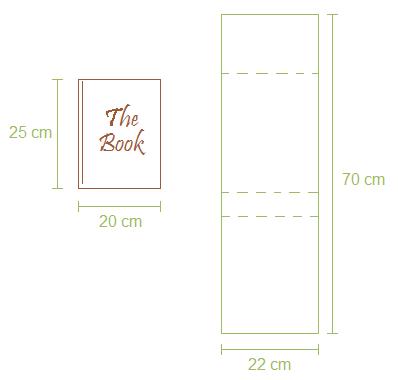
Start by measuring the object concerned - in this case, a book. You'll only need a little margin, since we're making an envelope that needs a little deep.
Materials listing:
- Felt with approximately 3 times the book height
- Pieces of green felt, if you want to decorate with leaves, like I did
- Filling, also for the leaves
- Embroidery thread (I've used green for the borders and brown for the leaves)
Set the flap size as you prefer and... embroider the borders! Yes, simple like that! I've used blanket stitch, and I must confess it got better in the end - I wasn't going all the way out to close it, and that's exactly the way it looks best! I'm not sure you can see what I mean, maybe it's not even possible to see this detail (it doesn't matter, no one needs to notice the little flaws, right?).
For the leaves detail, I've drawn one on a piece of paper, free hand, and then put it on the felt to cut. I've made the detail on the center using backstitch, and the leaves contour with blanket stitch again - leaving an opening to add the filling before closing it:
That's it! Quick and simple, perfect to replace gift wrap, and it will for sure cause a bigger impact on whoever receives it, because it shows how much you care!
If you don't know how to make blanket and back stitches, there are lots of sources available: videos on Needle'nThread and graphics on Méri's illustrated glossary - which also helps in case you need to find videos and other sources in portuguese or another language. I highly recommend them both!
You can make variations of this idea in many forms: using another kind of fabric (only felt has the advantage of not shredding), make the details with other shapes (flowers, circles, anything), put some kind of closing, like buttons or even velcro, and, of course, wrap other things besides books.
In case you have any question, feel free to add questions in the comments section or send me an email. If you use this idea to make anything, don't forget to send me pictures!
Sunday, November 29, 2009
Tutorial: Passport Wallet
After a long time, I'll do as I promised: behold the passport wallet tutorial!
The project started on paper, of course, but I added things as I went. Don't mind the crooked sewing, and go ahead!
The drawing I've made before starting cutting fabrics was sort of like this:
I've measured my passport (it's 9 x 13 cm), and then I've added a few centimeters around. I also wanted to have pockets I could use for credit cards, and I've ended up adding another pocket behind the one for the passport. Concept done, hands on!
Don't forget to add to the measures below, so you have sewing margins. 0,5 cm each side are usually enough.
Cut the plain fabric:
- one piece 10 x 11, for the passport pocket
- one piece 16 x 11, for the pocket behind the passport
- two pieces 7 x 11, for the smaller pockets
- one piece 16 x 22,5, to be behind all pockets (the back of the wallet)
On the patterned fabric:
- two pieces 5 x 11, to close the smaller pockets
- one piece 16 x 22,5, to be the exernal part of the wallet
Also cut a piece 16 x 22,5 cm of filling.
First sew the pockets: the one behind the passport on the back, and the passport pocket over it. Now sew the small pockets on the back fabric. Then sew the pocket flaps apart, and after that sew them above the pockets. Finally, make the sandwich with the internal part (with all the pockets already in place), the filling and the external part, wrong side out. Leave a space without sewing so you can turn the sandwich the right way.
Turn eveything inside out, and push the corners with a pencil or even a knitting needle. Sew the opening to close.
I've chosen to close out the wallet with buttons, but you could also make a flap with velcro - one of the buttons got ripped out in the middle of the trip, because the backpack was a mess during our long walks.
But it's cute to close it with elastic, and you can fill the wallet as much as you need and things are hold tight in there.
That's it! Very simple and made in two hours. It's very practical during travels, because you can keep everything inside it, and the size makes it easy to find inside the purse. I hope you enjoyed it, go ahead and leave a comment! If you have questions about any steps, just write me about it. Have you ever done any project like this, without much planning, from the top of your head? Let me know!
Before anything, remember I've done it a few days before traveling, and I was DYING to do something on my sewing machine. So the fun was in making it, and not worrying if it was perfect. And having only made one purse with my machine before this project, imagine my skills with it...
The project started on paper, of course, but I added things as I went. Don't mind the crooked sewing, and go ahead!
I've measured my passport (it's 9 x 13 cm), and then I've added a few centimeters around. I also wanted to have pockets I could use for credit cards, and I've ended up adding another pocket behind the one for the passport. Concept done, hands on!
Don't forget to add to the measures below, so you have sewing margins. 0,5 cm each side are usually enough.
Cut the plain fabric:
- one piece 10 x 11, for the passport pocket
- one piece 16 x 11, for the pocket behind the passport
- two pieces 7 x 11, for the smaller pockets
- one piece 16 x 22,5, to be behind all pockets (the back of the wallet)
On the patterned fabric:
- two pieces 5 x 11, to close the smaller pockets
- one piece 16 x 22,5, to be the exernal part of the wallet
Also cut a piece 16 x 22,5 cm of filling.
First sew the pockets: the one behind the passport on the back, and the passport pocket over it. Now sew the small pockets on the back fabric. Then sew the pocket flaps apart, and after that sew them above the pockets. Finally, make the sandwich with the internal part (with all the pockets already in place), the filling and the external part, wrong side out. Leave a space without sewing so you can turn the sandwich the right way.
Turn eveything inside out, and push the corners with a pencil or even a knitting needle. Sew the opening to close.
I've chosen to close out the wallet with buttons, but you could also make a flap with velcro - one of the buttons got ripped out in the middle of the trip, because the backpack was a mess during our long walks.
But it's cute to close it with elastic, and you can fill the wallet as much as you need and things are hold tight in there.
That's it! Very simple and made in two hours. It's very practical during travels, because you can keep everything inside it, and the size makes it easy to find inside the purse. I hope you enjoyed it, go ahead and leave a comment! If you have questions about any steps, just write me about it. Have you ever done any project like this, without much planning, from the top of your head? Let me know!
Subscribe to:
Posts (Atom)